Most of the inlay is very easy; the only tricky part is the corners, where the goal is to have no gaps. Beyond this basic level, one can add style points by making a "bee sting." This is an extra little bit of black on the outside that protrudes ever so slightly from the corner. So, it's necessary to fuss around for a bit to get the corners just right. As always, dry-fitting precedes gluing.

Once the glue is hot, it's time to actually set in the purfling. A small amount of glue is placed in the channel, which immediately makes life difficult. The glue cools quickly, becoming more and more viscous, and the wood absorbs water from the glue and swells, making the channel narrower. Generally, some vigorous tapping with a hammer is necessary to drive the purfling home and distribute the glue throughout the channel. Here's the result--not my best corner.

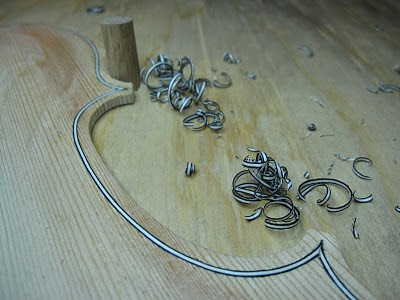
After the glue has dried, the purfling is made flush with the rest of the plate with thumb planes. This always makes it look better, and it gives you pretty shavings.


No comments:
Post a Comment